Sunday, October 30, 2011

China Glaze: Cowgirl Up

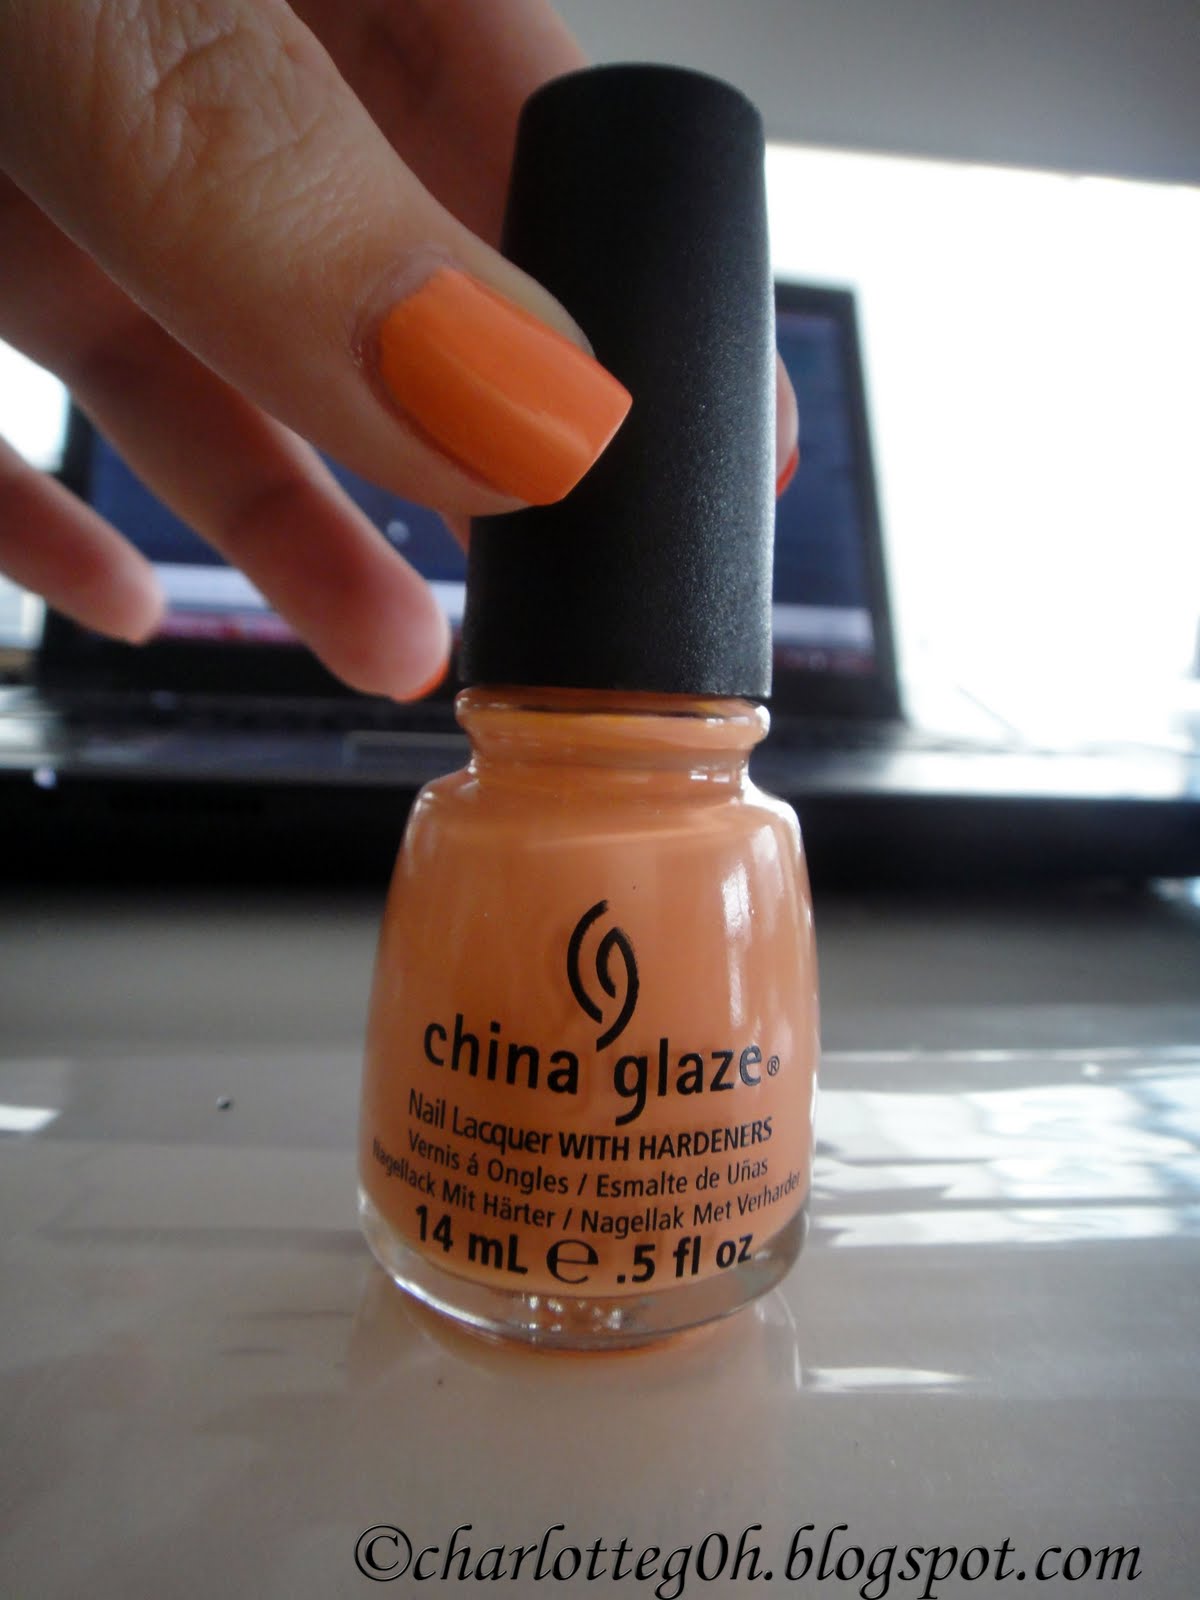
Cowgirl Up is from the Rodeo Diva Fall 2008 Collection. It kinda reminds me of OPI's Diva of Geneva which is also a very diva-ish colour.

I'll describe the colour as deep plumish burgundy. It has a 80% shimmery 20% frosty finish to it which is b-e-a-u-tiful! The shimmer really shimmers *lol* under the sunlight. Love it! I think this colour is flattering against any skin tone since it is not a cool nor a warm tone colour.

The application is quite messy for me, the formula is slightly watery. I finish it with two coats, but since it is a dark colour, you can still get away with just one coat. :)

Is this a yay or nay for you? I know for certain Zoe (my youngest sister) will love this!

xoxo
Charlotte

Thursday, October 27, 2011

OPI: Tickle my France-y

****Apologies to all my OPI babies****

I've been using China Glazes lately, so much that I almost forgotten about all my OPIs. As I was looking through my stash of nail polishes, thinking which colour should I wear, this pretty little baby here was screaming for my attention.


Tickle My France-y is from the La Collection De France for Fall 2008. Though it has been 3 years since its debut, it is still the favourite of many people, including myself.

I would describe TMF as a dusty rose colour: nudish-pinkish-mauve. I find this colour very sweet, elegant, feminine and romantic. It is definitely not the average nude colour you see everyday. There is just something very special about it.

This colour is also work appropriate, feel free to wear this to work everyday or to attend job interviews. It gives you a put together, polished look.

The only complaint I have is that the formula is kinda watery. Hence, you need about 3-4coats to get it opaque. BUT I love it so much that I stick with that issue.


OPI Tickle My France-y under different lightings


Love,
Charlotte

Wednesday, October 26, 2011

Sephora.com's Friends and Family Sale!

URGHHHHH!! Why doesn't Sephora.com ships internationally already? Then, I don't have to search and flip Google upside down to find a seller that sells a product that I'm interested! After finding one, I need to check and read the reviews on that particular seller to ensure that it is safe to shop! Seriously, time consuming. grrrrr...

Anyway, I'm still going to share this out to my US readers (if there're any). Sephora.com is having a Friends and Family Sales from 26th of Oct till 2nd of Nov! The Friends and Family discount (20%) is a benefit only for Sephora employees to extend their personal networks. I happen to come across this through TiffanyD's blogpost.

  • Get your unique promo code (the code can only be used once) and enter the code before you check out!
  • You can always cheat by using a different email address and get another code to place another order (just in case if you forget to buy something during the first order)
If you have friends who live in US, simply place an order with the billing address being your friend's address and ask them to mail it to you upon receiving your items.

To those who are able to purchase, enjoy shopping! :)
To those who are unable, join me and be jealous together! >;3

Love,
Charlotte

Tuesday, October 25, 2011

[Tips] DIY Half Moon / French Manicure? Easy Peasy!

We've seen many celebrities like Rihanna and Dita von Teese, wearing the half moon manicures these days:

Rihanna

Dita von Teese

Just head to your favourite nail salon and ask your favourite manicurist to do this for you
ORRRRR
you can always do this yourself! (YES! On your own!! No skills needed!)
and the secret weapon is
....
..
.
.

REINFORCEMENT RINGS!
Yeap! Its the thingy you stick onto your paper to prevent the holes at the side from tearing.
You can easily get this at any bookshop.

So, let me guide you step by step on how this should be done.

#1 'Ingredients' needed

  • nail polish/es of your choice (one or two depending on whether you want a clear base or not)
  • base coat of your choice
  • top coat of your choice
  • reinforcement rings
#2 Basic nail polish application
  • Start off with a base coat to prevent staining
  • One or two coats of nail lacquer depending on how opaque you want your base to be (Note: give time for each layers to dry before applying the next layer)
  • Top Coat (optional)
  • Wait for it to dry thoroughly - I'll usually leave it on for a day before proceeding to the next step
#3 Stick the reinforcement rings onto each of your fingers

  • Make sure the edges are sealed perfectly, you don't want the 2nd nail polish to leak below the rings creating an imperfect half moon.
  • It is up to you on how 'big' you want your half moon to be but make sure that the sizes are consistent for each fingers
#4 Paint the 2nd nail polish of your choice over the reinforcement rings

  • You don't have to be very careful in this step, just make sure that the upper part of your nails are evenly painted
  • Again, you can go for two or more coats or just settle for one. (Note: give time for each layers to dry before applying the next layer)
#5 Wait for it to dry COMPLETELY before peeling out the rings.

#6 After peeling the rings out, top it with a layer of top coat to enhance the staying power of your manicure

#7 Finito!
Voila! clean and neat!

This is one of the many ways to add a little spice to the normal monotone manicure. You can even use the reinforcement rings to do a DIY french manicure! Just place the rings slightly higher on your nails!

Products used:
  • Base Colour: China Glaze's Below Deck
  • Top Colour: OPI's Do You Lilac It?
  • Base Coat: NailTek Maintenance Plus
  • Top Coat: Seche Vite Dry Fast Top Coat
Love,
Charlotte

P/S: Sorry for the chipped base, too lazy to repaint my nails! :P

Monday, October 24, 2011

[Review] Giorgio Armani: Eyes to Kill Mascara

To be honest, I bought this mascara without thinking twice, bought it for the sake of releasing some stress accumulated from my studies and what not.

*I have this issue whenever I'm stress, after buying something or spending some money, it'll make me feel much better*

SO, I wanted to get Eyes to Kill Waterproof Mascara (silver packaging) at first, but unfortunately, they only have it in brown and not black. The sales lady convinced me that the Eyes to Kill Mascara (metallic black packaging) will not smudge as it is water resistant. I'm quite skeptical when it comes to water resistant mascara since I have combination skin, I've tried quite a few of those and some still gives me panda eyes @.@ In the end, I still decided to give this a try.

Enough of blabbering, back to reviewing...

BEFORE applying the mascara
I have average lashes, wouldn't call it short, but it wouldn't show up much when you see it from the front.


AFTER applying the mascara
You can definitely see a difference.
Especially from the front view, it makes my lashes look fuller and longer!


The Pros
  1. Love the packaging: sleek and gorgeous. The metallic black color makes it stands out among the boring black packaging mascaras :)
    1. The bristles are able to reach out to each of your lashes, giving you defined looking lashes.

    2. It doesn't clump!
    3. After wearing it for a good old 10 hours (approximately), it really didn't smudge at all!
    4. Thumbs up for length and volume.
    The Cons
    1. The product is heavier compared to the normal mascaras, but it really doesn't bother me much.
    2. It is expensive. URGH! !@#$#%#$^@#?!
    Conclusion is....
    [APPROVED!!]

    I wouldn't say it is a MUST BUY, since the price of this is really a big issue here. But if you like to try new stuff, this baby here is definitely worth the try!

    Where to buy?
    Any GA cosmetics counter.
    Malaysia: KLCC, Pavillion, Parkson etc
    Aussie: David Jones, MYER

    Price: AUD55 from David Jones (I think you can get it much cheaper online or Malaysia, like I've said, I bought without thinking twice! dammit!)

    Love,
    Charlotte

    P/S: sorry for that untrimmed eyebrows, been kinda lazy lately! :P and close-up-eye-pictures really does look kinda scary -__-"

    Sunday, October 23, 2011

    China Glaze: Below Deck

    Below Deck is from the Anchor's Away Spring Collection 2011.


    I love love...........love love love this colour!! Some say its a dupe of China Glaze's Channelesque, and some say OPI's Parlez-Vous OPI?. I don't own those two but IMO it reminds me of one of the many OPI's I own - Over the Taupe, but with a hint of greyish/purplish tone to it.

    The application is a bliss! It is creamy and opaque in just one thick coat or if you like, two thin coats. The swatches shown below takes only one coat.


    *It annoys me when the pictures just don't do the colour justice, it is more purplish irl! #@$@%!

    Since it has a neutral tone, this color can easily go with anything. It screams chic, sophisticated, classy all in one breath! For me, it's the kinda color that is able to make a statement without any negative judgments. For example, black = goth and red = slutty *blablabla you get the idea*

    If you're hoping for a BUT, sorry there won't be any. Unless you just don't like this shade of color in general.

    Cheers,
    Charlotte

    Friday, October 21, 2011

    [FOOD] Max Brenner

    Yours truly here have sweet TEETH! :D I've heard so many great things about this place called Max Brenner. Everyone said that it's a MUST-GO-PLACE especially when you're a chocolate lover! and I couldn't agree more on that..

    Belgian Waffle with Vanilla Ice Cream

    Chocolate Dip

    Chocolate with Crunchy Waffle Balls

    American Marshmallow Chocolate

    And that is how you hold a hugmug! It's a bliss to hold it in your hand especially during winter!
    That's my sister, Alyna btw! I hope she doesn't mind me putting her face up on my blog. *teehee*

    Belgian Waffles and Chocolate Dips are my all-time favourites! I'm more of a coffee person than a chocolate person, but during winter it does feels nice to hug your hands around that hugmug :D

    If you were wondering about the price and other varieties of dessert they offer, do check out their menu here!

    Max Brenner Chocolate Bar
    300 La Trobe Street, Shop OE5,
    Menzies Alley, Melbourne Central Shopping Centre,
    Melbourne Vic 3000
    (03) 9662 4442 ·

    210 Lonsdale Street,
    Melbourne VIC 3000
    (03) 9663 6000 ·

    Cheers,
    Charlotte the Glutton

    China Glaze: Peachy Keen

    Yay! I've finally submitted my last assignment for this semester! Even though it was quite badly done but that wasn't the point! *if you get what I mean* And since my nails have been left naked for quite some time...

    Like Re-fresh Mint, Peachy Keen is from the same Spring - Up & Away Collection! To be honest, I find this color to be quite a disappointment :( It wasn't as soft and pastel-ish as I thought it would be. *pout* In my opinion, it is more of an orange shade and orange does not complements my skin tone!! BUT I still love this nail polish for its opacity and the application isn't that much of a problem!

    China Glaze Peachy Keen in one coat

    China Glaze Peachy Keen in two coats

    I don't know if it's me or what, this nail lacquer dries pretty fast. So, I guess that is another plus point!

    Will be using this shade along with another matching color for a french/half moon manicure or other designs but less likely alone anymore. But who knows when I might have a sudden craving for such colors? hurmss..

    Since Halloween is just around the corner, Imma gonna leave it on my nails until it starts chipping. Speaking of Halloween, have you already know who or what you are going to be? :)

    Love,
    Charlotte

    Friday, October 14, 2011

    China Glaze: Second-Hand Silk

    Second-Hand Silk is from the ImMaterial Gurl Collection back in 2008. It's a pink with a purplish hint to it. Many thinks that this is a 'Barbie' pink, I can see why. Its the kinda pink that Barbie will have on her lips. But at the same time, a 'Barbie' pink to me is supposed to be a brighter darker pink as it is the pink shade that most of her clothings are.


    Second-Hand Silk under different lightings

    The application is a bit of a problem as it is quite streaky but it will turned out perfectly even and opaque after three coats. The formula is quite watery, hence it has to be applied carefully, otherwise you're going to get a lot of your cuticle dragged.

    Putting those aside, this color is really pretty. It is soft and girly, which I like! I can see myself reaching for it quite often! :)

    Love,
    Charlotte

    Thursday, October 13, 2011

    [Review] Make Up For Ever: Mat Velvet+ Liquid Foundation


    This baby here is my all time FAVOURITE liquid foundation! Lets see what it has to offer:

    Source: www.makeupforever.com

    Well, I've always thought that liquid foundations has this very 'fake' finish and it is too heavy for my liking. I wasn't a fan of them until I discover MUFE Mat Velvet+. I've been having this for about a year now and I have many good things to say about it:

    The Pros
    1. I love the packaging *Check out the picture below and you'll know what I mean*
    2. I like the smell of it!
    3. It is everything it claims to be:
    • Long Lasting: I've worn it for the whole day and I don't need any touch-ups!
    • Oil free and smooth!
    • Evens out complexion: I have uneven skin tone, hence I can judge this!
    • Water Resistant: Even if it rains, your face wont look like a melting painting canvas! But that doesn't mean you can wear this to swim and still look perfect right after =.=
    • Good coverage: Just a small drop is enough to achieve a natural finish; If you want a perfect matte look, just layer it.
    • Natural and Matte Look: It gives a shine-free, non-cakey finish and DOESN'T look like you're wearing a mask!
    It has a sleek packaging! And it's plastic!

    Love the opening! Makes it easier to control the amount you want when you're squeezing the tube.

    This is the amount you need for a natural finish!

    Blends in well!

    I wear only the liquid foundation. No concealer, no blush, no powder.

    The Cons
    1. Because it is water resistant, you need wash your face thoroughly!
    2. It is quite pricey but worth the price! And it can last you quite some time.
    Conclusion is.....
    [APPROVED!! BUY BUY BUY!]

    Price: MYR125
    Shade that I'm using: #20 - Ivory

    Cheers,
    Charlotte

    [Haul] From Crush Cosmetics!

    *ding dong!* I just received my parcel from Crush Cosmetics this morning! Such a great start for the day! So decided to share with you guys..

    • Nyx Mega Shine Lipgloss in Sugar Pie and Golden Pink
    • Elf Matte Lip Color in Natural and Coral
    • China Glaze Nail Polish in Peachy Keen, Something Sweet and For Audrey
    • Milani Baked Blush in Corallina and Luminoso
    Can't wait to try them on! *skips around the room*

    Oh ya, before I forget, I have always wanted to do a shopping review on Crush Cosmetics. So here goes: I've bought a few products from them in the past few months, if I'm not mistaken this is my third time receiving their parcel. You can purchase brands like China Glaze, Nyx, NYC, Ardell, Milani, Elf, Coastal Scents etc from them. The service provided are quite consistent:
    1. Shipping takes only 2 days to arrive after placing your order (in my case)
    2. Any enquiries through email take less than 24 hours to get a reply
    3. They do not ignore your request (i.e. I told them to bubble wrap all my items, and they did!).
    Besides that, they have a flat shipping rate! and if you were to purchase more than AUD60, you're entitled for a free ground shipping!

    They are Australia based and they don't do international shipping :(

    Wrapping everything up, it is safe to say that Crush Cosmetics is a trusted site to shop!

    Have a great day!

    Cheers,
    Charlotte

    Wednesday, October 12, 2011

    [Tips] Getting Flawless............Almost!

    If a genie were to grant me a wish, I would wish for world peace!
    ....................................................
    ..........................................
    ...........................
    ................
    .......
    ...
    .
    .
    .
    .
    .
    .
    .
    .
    .
    .
    HAHA! AS IF!
    Being the selfish me, I would ask for unlimited wishes for as long as I'm alive!
    *muahahaha*
    And one of them will definitely be having flawless skin!

    How often do you walk pass a poster hoping you have the skin like the model? Seriously, who doesn't want flawless skin? If I have flawless skin, I don't think I will be applying make up anymore!

    Now, step back to reality, is it really possible to have such skin? Sadly, the answer is NO! BUT at least the closest you can get to is a smooth, glowy skin without blackheads or acnes!

    Besides being blessed with good hormones and genes, and having a set of good skincare products that suits you, here are a few extra things that you can do:


    ALWAYS remove your make up before you sleep! Even if the make up is very minimal, it is going to clog your pores overnight! I am very particular when it comes to removing make up, its a 3 steps process for me. First, I'll use a make up remover tissue to remove my make up. Next, I'll use my Clarisonic along with a pump of cleansing oil to clean my face. Lastly, I'll wash my face again with normal facial wash, making sure that there isn't any residual of anything on my face! Another reason why you should remove your make up before bed -- you don't want to wake up and find color patches on your pillow! ewwww..


    Wash your face twice a day (with facial wash of course). Once in the morning after you wake up and once at night before you sleep. This is a must! Even if you're not wearing any make up during the day, the dirt and dust in the air can clog your pores. In my case, sometimes I'll wash 3 times a day, one more during shower or whenever I get irritated over my oily face. However, it is not advisable to wash too often, your skin might end up getting too dry.


    Schedule yourself at least one make-up-free-day in a week. Your skin needs to breathe after having make up on for the entire week. Pick a day where you find comfortable without make up. For me, I'll pick the day when I don't have any classes to attend and no important events to go to.


    Keep your hands off your face! Your hands pick up and drop off germs every time you touches something!


    Drink a lot of WATER! not soda, not coffee, not tea! JUST PLAIN WATER! Water flushes out the bad stuff that causes bad skin. Add a slice of lemon to help rejuvenates your skin *ting!*a plus point!.


    Clean your make up tools. Dirty brushes and sponges are the best place for germs and bacteria to breed and you definitely would not want to stick them onto your face! Spot clean them everyday and deep clean them every fortnight with either a brush cleanser or mild shampoo.


    Scrub! Scrub! Scrub! Exfoliate your skin once a week. Say bye bye to dead skins! Besides leaving you a smooth face, it also provides better absorption for your skincare products, making them more effective!! Do not over do it, once a week is sufficient.


    Sleep 8 hours a day. Do not stay up late as this will disturbs your body's detox system. *psst..this is the only step which I don't follow :P*


    Sweat it out! Do whatever you want to get a good sweat as sweating is able to unclog your pores. But remember to WASH your sweat off! You don't want your hair products or whatever to mix with your sweat and slide down your face!


    Put that cigarette stick away! Smoking restrict blood vessels, preventing oxygen and nutrients from getting to the skin, that is why most smokers look pale and we definitely do not want to look like that!


    Treat your skin once a week. You can give your skin a treat such as applying face mask or steaming your skin. However, this must be done according to your skin type, or you might make it worse!


    These are what I got so far, do you happen to come across any useful tips? Do share! :) The tips suggested above does not require any expensive investment, what is there to lose? Follow them and you are one step closer to the almost perfect skin!

    Love,
    Charlotte